




WHY ARE WARNING LIGHTS USED?
Warning lights are used to warn or alert other road users. For example, a vehicle may need to be stationary on the road or driven in a way that could constitute an obstruction.
WHEN MAY WARNING LIGHTS BE USED?
- 1. Road maintenance work or similar work
- 2. During vehicle recovery and transportation of a recovered vehicle
- 3. In connection with vehicle inspections or equivalent activities
- 4. At an accident site or equivalent location
- 5. When the vehicle width, including equipment or implements, exceeds 3 m
- 6. When warning lights are stipulated as a specific condition for travelling on the road
- 7. By road transport escorts when escorting long, wide or heavy transports
- 8. In other cases comparable to points 1–6
To make matters more complicated, different competence requirements apply depending on the type of work or role you perform. As the user, it is your responsibility to ensure that you have the required knowledge. The competence requirements are divided into three levels, and courses on the subject are usually referred to as "Arbete på väg" (Work on Roads).
WHAT ARE THE REQUIREMENTS FOR WARNING LIGHTS?
There are several regulations to consider regarding the product, installation and use of warning lights.
PRODUCT REQUIREMENTS
- When you buy from Work System, you can rest assured that our products meet the applicable requirements (see below).
- 1. The warning light must be approved in accordance with REG 65 and emit an amber light that appears to flash. All warning lights sold by Work System have an approved flash pattern. However, some products may have reprogrammable flash patterns where not all variations meet the requirements.
- 2. The warning light must be type-approved in accordance with ECE 65 or by the Swedish Road Administration/Swedish National Road Safety Office.
- 3. The warning light must carry ECE R10 approval in accordance with EU legal requirements to prevent interference with other electronic equipment in the vehicle. The marking means that the warning light has been tested for both emitted and received electromagnetic radiation.
INSTALLATION REQUIREMENTS
- When installation is carried out by Work System, the installation will meet the requirements unless you, as the customer, request otherwise. Please also remember to inform us of any specific requirements.
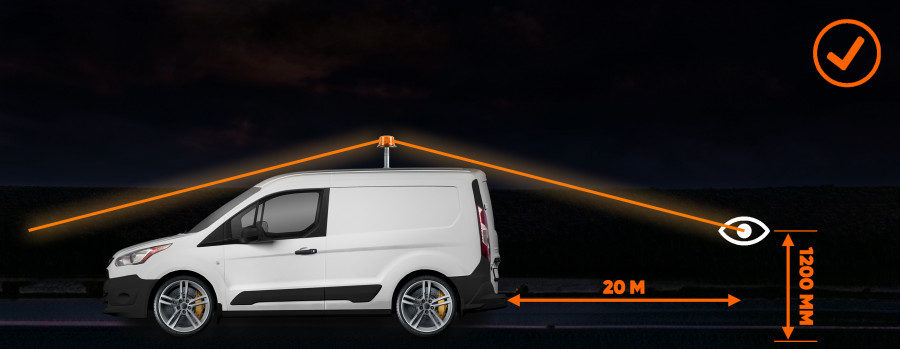
- 1. Warning lights must be positioned so that the centre of at least one light source is visible from a distance of 20 m from the vehicle at a height of 1.20 m above ground level, regardless of the viewing angle, i.e. 360° around the vehicle.
- 2. Warning lights must be positioned so that their axis of symmetry is as close to perpendicular to the ground plane as possible, i.e. the light must be emitted straight out at the same angle as the ground.
- 3. A vehicle equipped with warning lights must have an indicator light visible from the driver's position that emits a steady amber light when the warning lights are switched on.
- 4. If the vehicle is equipped with more than one warning light, they must be connected so that they are switched on and off simultaneously. Individual warning lights may therefore not be switched on separately.
EXAMPLES OF POSITIONING AND INSTALLATION
Below are examples of both good and poor warning light installations.
Minimum acceptable
This installation, with a high-mounted beacon, meets the requirements but is still far from optimal and is therefore not recommended.
Intermediate
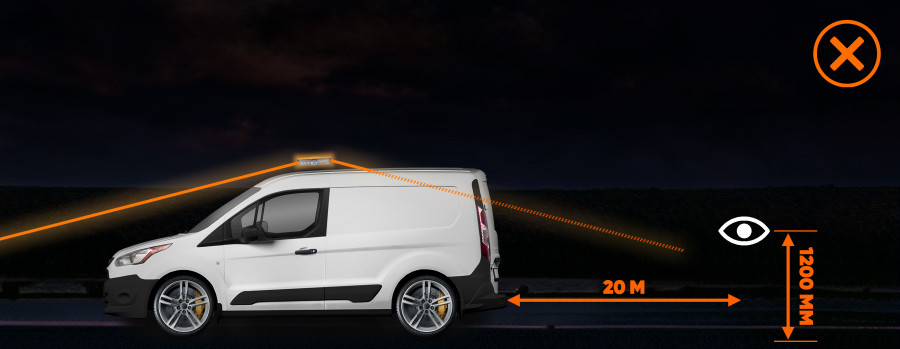
What many people do not consider with this installation is that the roof blocks the light towards the rear, which means the installation does not meet the requirements.
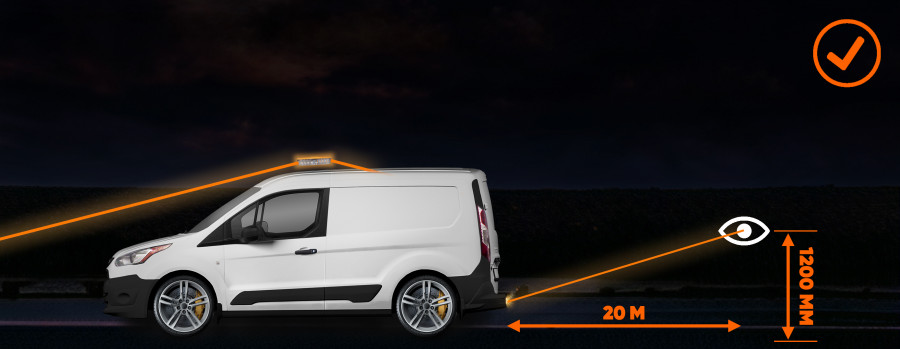
By supplementing the warning light bar with directional warning lights in the rear bumper, you get an approved installation.
Optimal
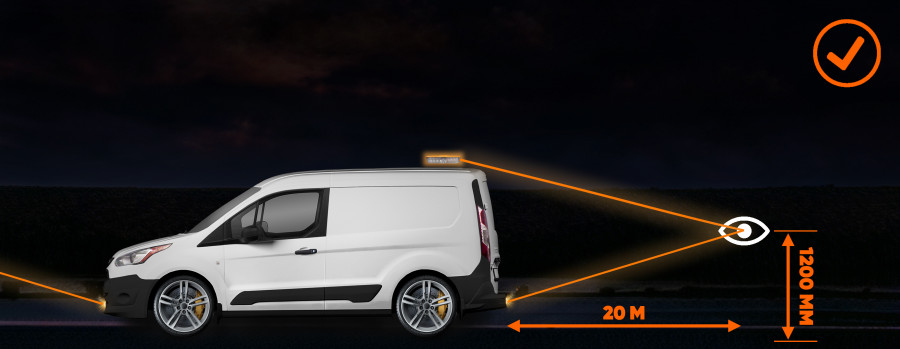
90% would probably say that rear visibility is the most important. Positioning the warning light bar towards the rear of the roof gives you a large illuminated area in that direction. Then supplement it with directional warning lights on the front/rear bumper for an approved installation. Recommended if you frequently work on roads!
A SELECTION OF OUR PRODUCTS
INTEGRATED WARNING LIGHT — WORK FLARE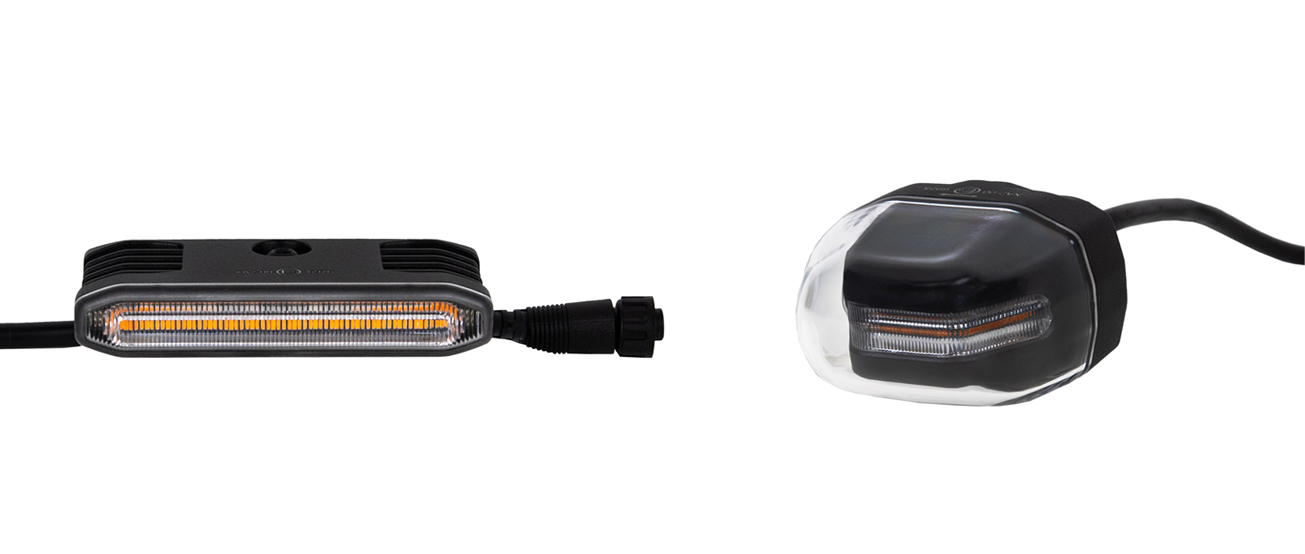 View available Work Flare packages |
The new generation of integrated warning lights that replaces both strobe lights and beacons. Work Flare is a revolution in warning lights, as the lights are installed directly into our roof racks, Work Bar, and provide extremely powerful illumination. Perfect if you want to keep the roof free for loading while retaining the flexibility to expand the number of modules to suit your specific needs. Available in several different packages depending on the intended application. |
WARNING LIGHT BAR — CRUISE LIGHT ROOF BAR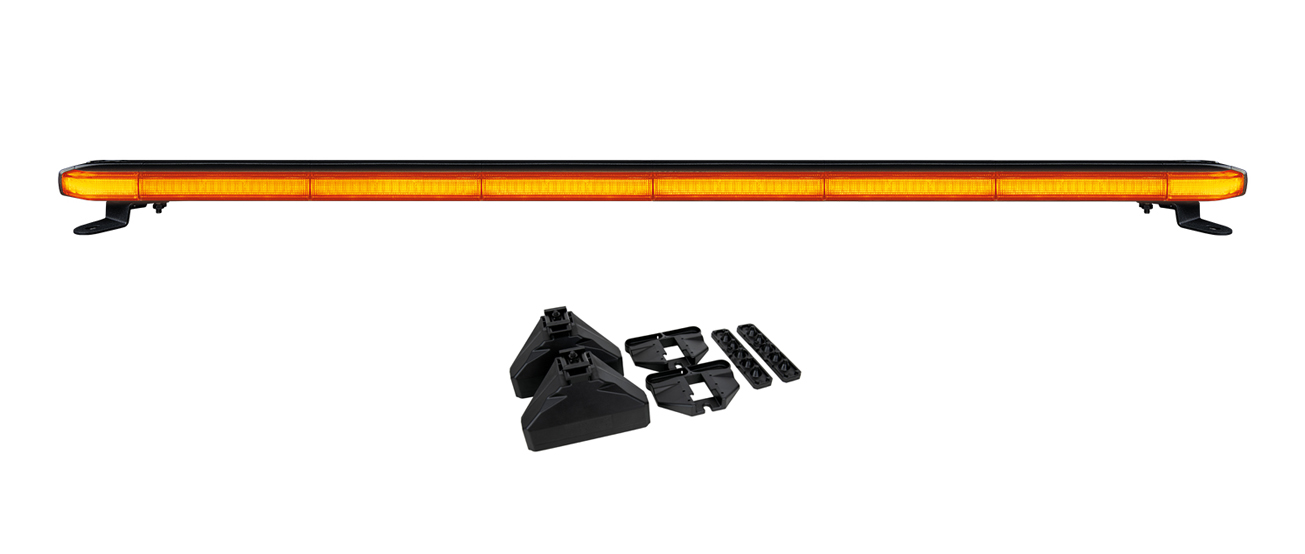 Item number: 83-CL-L108 | 83-CL-L123 | 83-CL-L138 | 83-CL-L153 |
If you do not need to carry loads on the roof, a warning light bar is an effective solution, ideal for vehicles that are taller than passenger cars, such as vans. The best position is at the rear of the roof, as this is usually the highest point of the vehicle and provides the best visibility to approaching traffic. The bar features a "cruise light" function that provides a constant but dimmer light. This function is not permitted on Swedish roads. For easy installation, we recommend our Flex Mount accessory, which uses the vehicle's existing fixing points and is available for many vehicle models. Available in four different lengths to suit different vehicle models. |
DIRECTIONAL WARNING LIGHT — V-LINE SLIM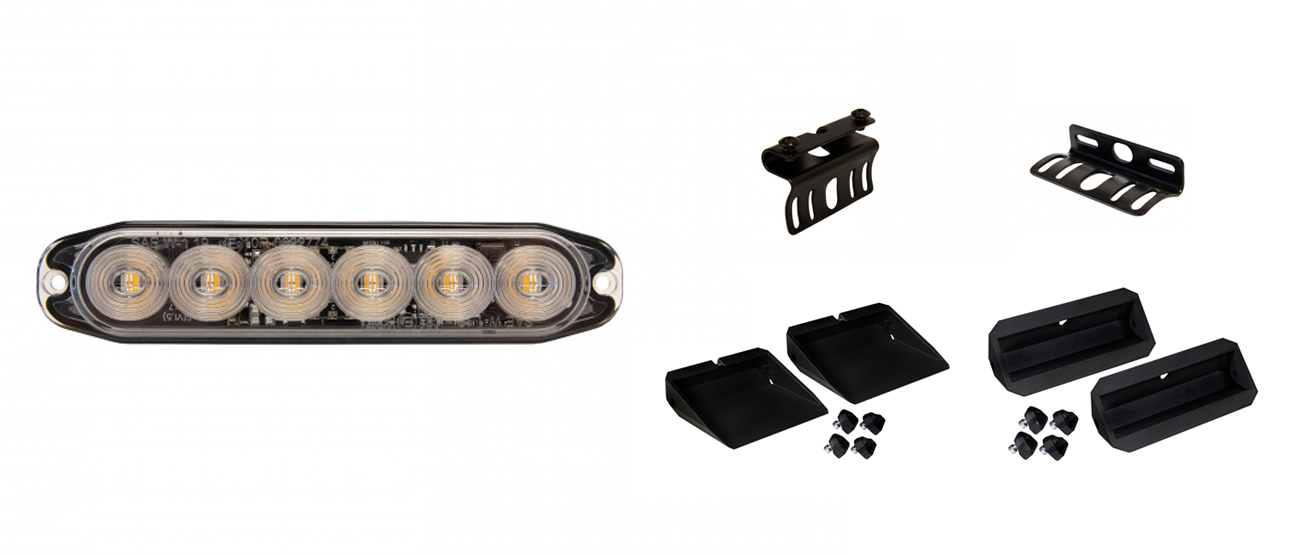 Item number: 83-VL-S-H25-B118-T7 |
V-Line Slim is a compact, directional surface-mounted warning light. An excellent choice if you want to avoid roof-mounted lights that increase the vehicle's overall height. Instead, they can be mounted on the vehicle body or bumper. Three different mounting brackets are available as accessories: a clamp bracket for installation in the grille, an angle bracket for installation beneath the bumper or roof rack, and a bracket for installation on the inside of the vehicle window. Remember that a sufficient number of warning lights must be installed to comply with applicable regulations. The warning lights must be directed/visible in all four directions around the vehicle. We therefore recommend at least two facing forwards, two facing backwards and one on each side. |
DIRECTIONAL WARNING LIGHT — V-LINE BOLD SQUARE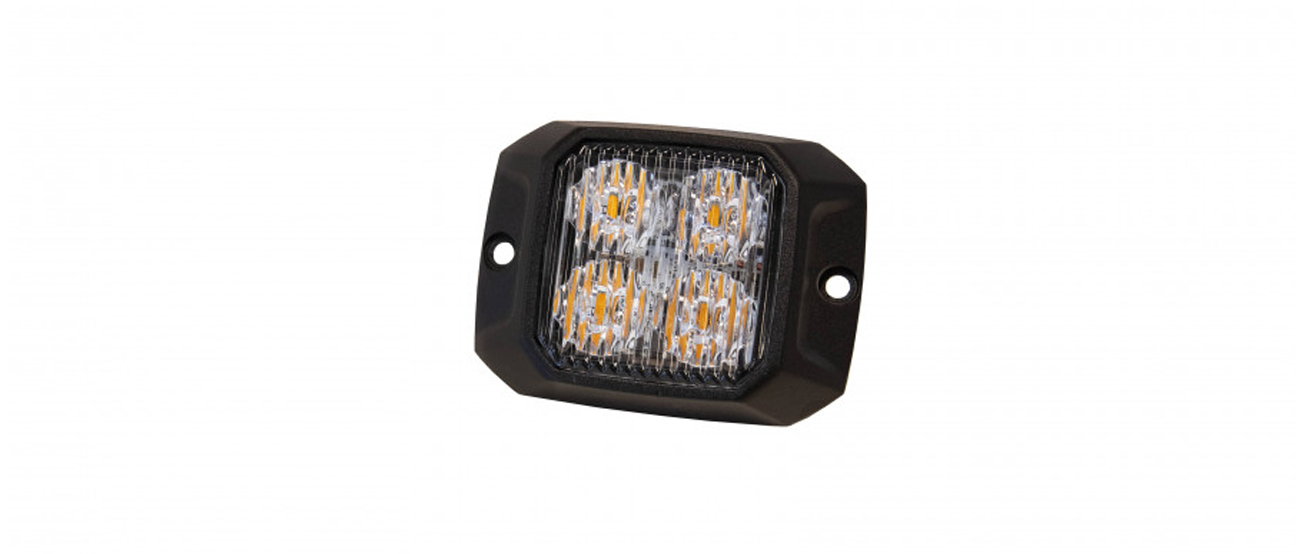 Item number: 83-VL-B-H55-B073-T14 |
V-Line Bold Square is a directional, surface-mounted warning light. It is an effective alternative to traditional rectangular warning lights. This model is particularly suitable for installation on exterior mirrors or other specific locations on the vehicle where a compact design is beneficial. To comply with applicable regulations, the vehicle must be equipped with a sufficient number of warning lights. The warning lights must be directed/visible in all four directions around the vehicle. We recommend at least two facing forwards, two facing backwards and one on each side. |
DIRECTIONAL WARNING LIGHT — KULA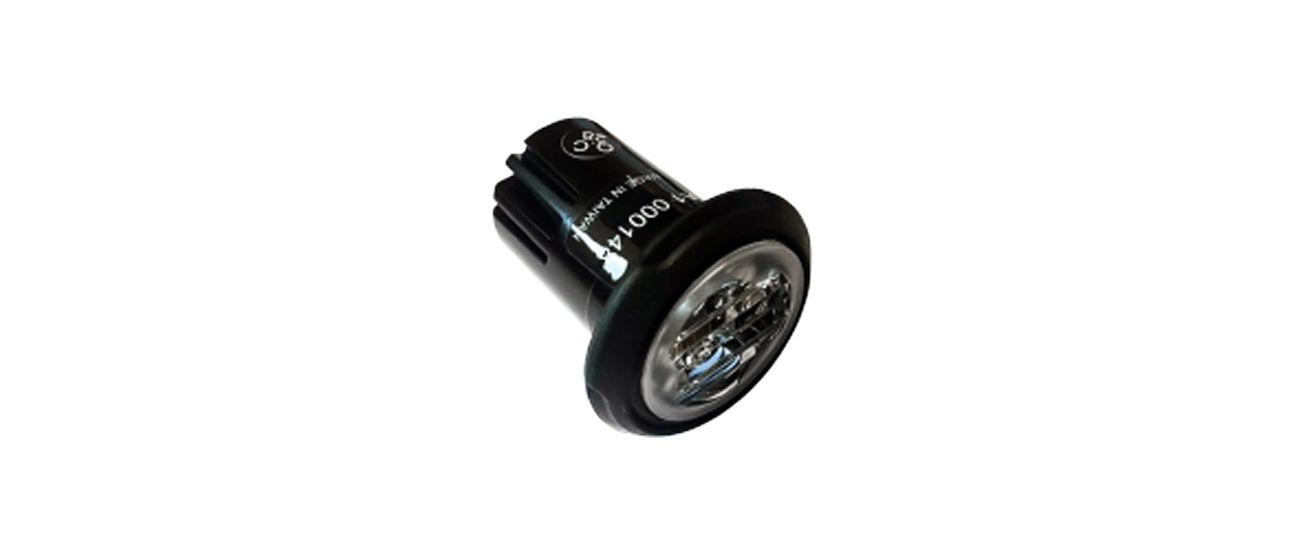 Item number: 83-H4-B3-A1 |
Recessed warning lights that work perfectly as a complement to other warning lights because they take up minimal space. When installing them, there are two important things to consider: make sure there is sufficient space behind the intended mounting position and position the ribs of the lens vertically to ensure correct light distribution. To comply with applicable regulations, the vehicle must be equipped with a sufficient number of warning lights. The warning lights must be directed/visible in all four directions around the vehicle. We recommend at least two facing forwards, two facing backwards and one on each side. |
BEACON — SlimLine | Ambra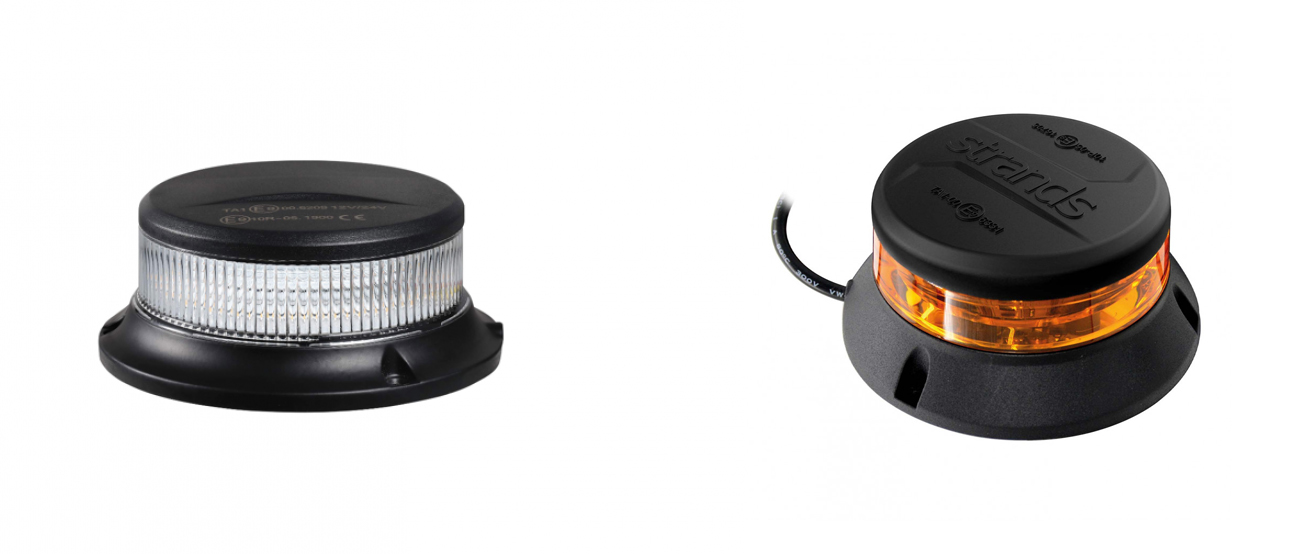 Item number: 83-SL-H5-D12 / 83-AMB-D10 |
A beacon is a cost-effective option because on a passenger car it is usually sufficient to install one on the roof, provided that the light complies with the regulations. If the vehicle has a higher roof, such as a van, at least two may be required. In this case, we recommend installing them diagonally on the roof: front right and rear left. This type of installation is suitable for vehicles that use warning lights only occasionally, as it does not provide illumination as powerful as, for example, a larger warning light bar. |
THINGS TO CONSIDER BEFORE ORDERING
Our sales team will be happy to help you find the right solution or product for your vehicle build. Contact us with your requirements and we will prepare a quote for you. Please also remember to inform us of any specific requirements. If you place the order yourself through our webshop, there are a few things you need to consider (see checklist).
Class 1 and Class 2
There are two different classifications for warning lights – Class 1 and Class 2 (TA1/TA2). The difference relates to the ability to reduce the light intensity in darkness. Class 1 cannot be adjusted, while Class 2 has a night mode that reduces the light output. The adjustment is made either via a sensor on the warning light or a button inside the vehicle.
Class 1 – is the minimum classification that a warning light must meet. It is a fully adequate option for Swedish roads, unless you or your employer have additional requirements. Class 1 is generally also less expensive and easier to install.
Class 2 – has two modes: one for daylight and a reduced-output night mode designed to prevent glare. In some cases, clients may require Class 2, for example as part of a procurement process.
SHOULD THE WARNING LIGHT BE CONNECTED DIRECTLY TO THE VEHICLE BATTERY?
If you intend to connect the warning light directly to the vehicle battery, we always recommend adding a battery guard or our Control System. This cuts the power if the voltage becomes too low, so you do not have to worry about draining the battery. If the connection is made to an auxiliary battery that is isolated from the vehicle's original battery, this is not as essential, but is still recommended.
As a general rule for batteries, the voltage should not fall below 12 V, as the battery may then begin to deteriorate and need to be replaced prematurely. How deeply the battery can be discharged before this happens depends on the battery type (lead-acid = 50%, AGM = 75%, lithium = no limitation). At the same time, keeping the warning lights operating is at least as important, so this is a balance that you, as the user, need to consider.
TYPE OF CONTROL
If you are installing several types of lighting, such as warning lights, work lights and interior lighting, we recommend our Control System. It includes a built-in battery guard, fuses and timer for the interior lighting, helping you avoid costly additional components. A matching remote control is also available for a neat and practical installation. The other option is conventional switches and fuses.
ORDERING CHECKLIST
- Once you have selected the right warning light setup, you will also need to purchase mounting brackets, wiring and controls. The products displayed on our website refer only to the warning light itself unless otherwise stated. To make things easier, suitable accessories are therefore automatically suggested when you add a product to your shopping cart.
- 2. Select a mounting bracket (unless included with the product)
- 3. Select wiring and controls
Remember to purchase the correct cable length. More cable is usually required than you might expect when routing it as discreetly as possible from point A to point B. For example, after installation, an 8 m cable will typically only cover approximately 4 m between the connection points.
ORDERING EXAMPLES
When ordering warning lights, it is useful to understand the available combinations and how the warning lights will be controlled/activated. Below are some general examples of how you can configure warning light installations using our product range.
INDICATOR LIGHT AND SWITCH
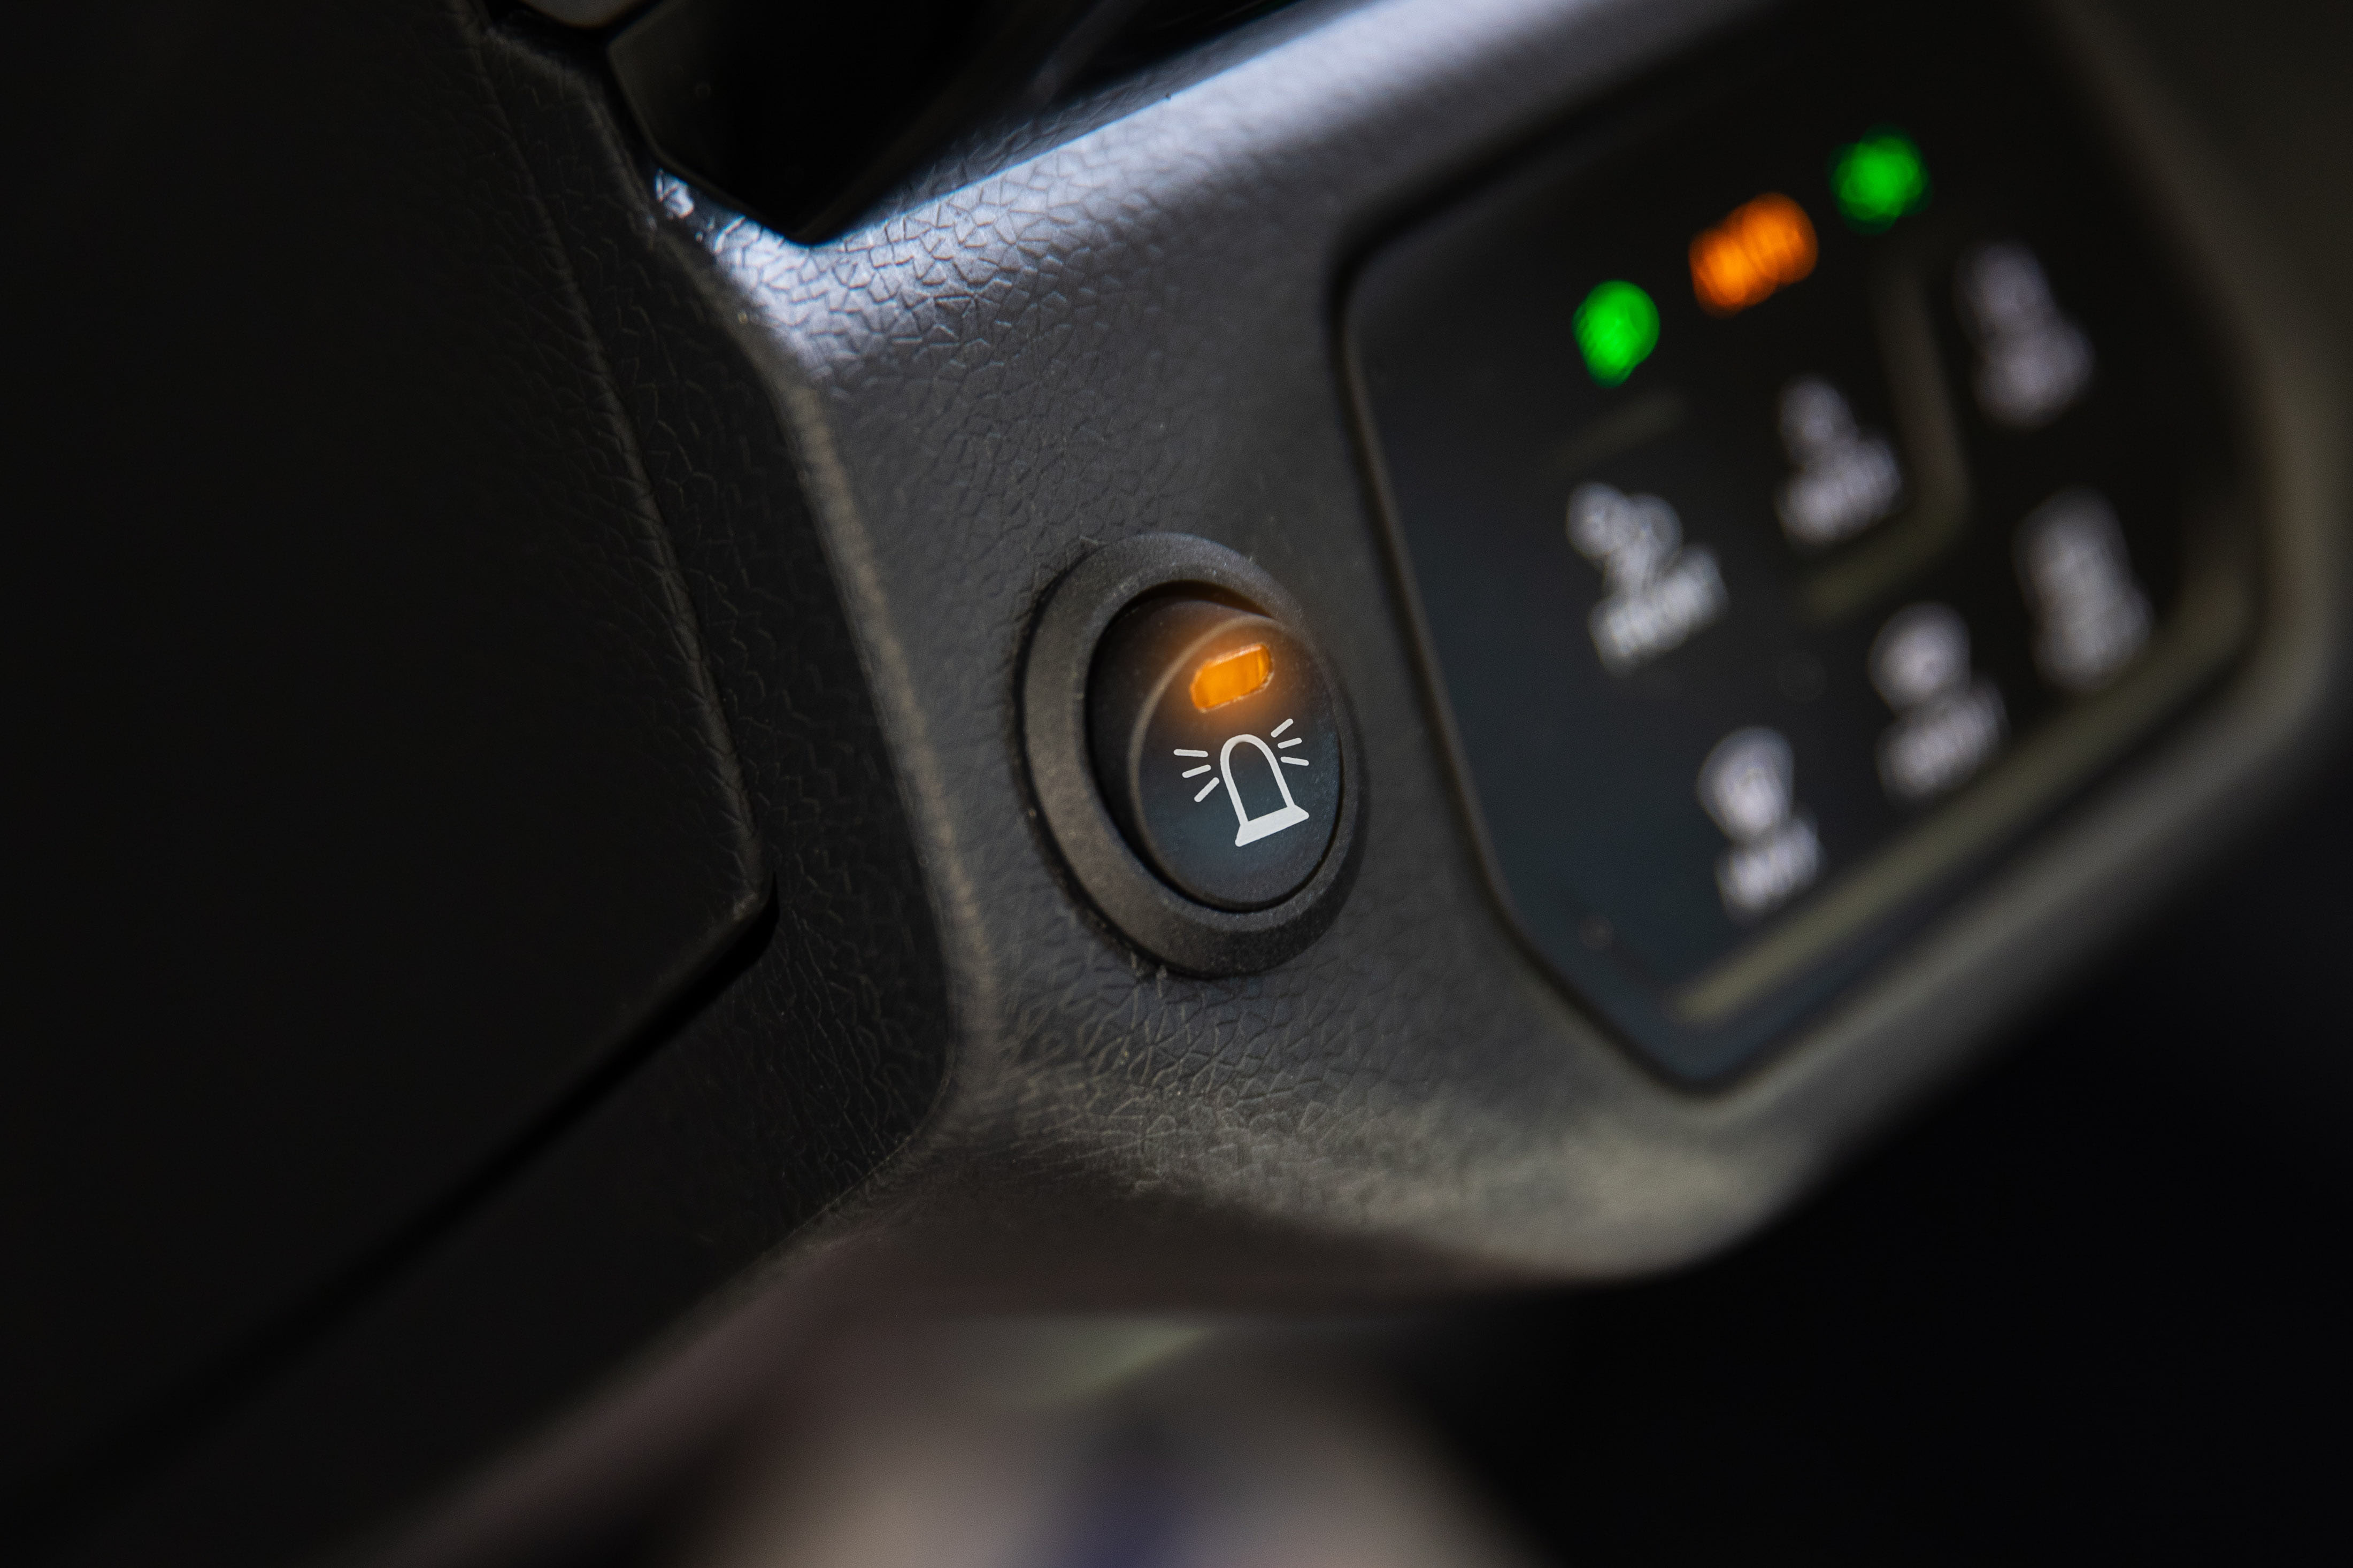
All warning lights installed on the vehicle must have a yellow indicator light with a steady light that is clearly visible from the driver's position and is activated when the warning lights are switched on. This prevents the driver from forgetting that the warning lights are active. A separate indicator light does not necessarily have to be installed, as an LED integrated into the button (switch) that activates the warning lights is sufficient. Our warning light switches have a built-in indicator light and are available as a complete package with a switch and fuse kit (item no. 85-KVL-CLR). If the vehicle is to be equipped with several installations, such as work lights, it may be advantageous to choose our Control System mentioned earlier (read more under "Type of control").
Work Flare
Our flagship series is sold as complete kits that include warning lights and wiring. It is important to note that the vehicle must be equipped with our Work Bar roof racks. The kits are universal and designed to fit a wide range of vehicle models, which means that the supplied wiring may seem either longer or shorter depending on the vehicle model. You also need to select a control solution (see "Indicator light and switch").
Available kits
SOLO – Kit for ONE roof rack with integrated warning lights.
DUO – Kit for TWO roof racks with DIFFERENT configurations of integrated warning lights.
TWIN – Kit for TWO roof racks with IDENTICAL configurations of integrated warning lights.
DIAGONAL – Kit for TWO roof racks with DIAGONALLY installed integrated warning lights.
SOLO, DUO & TWIN are supplemented with the size designations S, M & L to indicate the number of integrated warning lights included in the kit.
You can find the complete Work Flare range here.
WARNING LIGHT BAR
Mounting: Warning light bars, such as the Cruise Light Roof Bar, usually include mounting brackets that require holes to be drilled in the vehicle roof. Instead, we recommend using our Flex Mount roof mounting kit, which is available in several vehicle-specific versions and uses the vehicle's existing fixing points (original mounting points intended for roof racks). Another advantage of Flex Mount is that its height can be adjusted if required. If the vehicle is equipped with roof rails (longitudinal rails on both sides of the roof), the supplier may offer specially designed mounting brackets. If so, these must be designed for a slim warning light bar. If your vehicle has roof rails, please contact us and we will help you investigate the available solutions.
Control: You also need to add a control solution (see "Indicator light and switch"). Some light bars have a Cruise Light function. If this is to be connected, it is important to note that the function is not legal for use in traffic. If you still want it connected, there will be an additional cost for the product and installation of a momentary switch (item no. 921-KN-BLÅF), which allows the flash pattern and Cruise Light function to be activated/adjusted.
Wiring: The Cruise Light Roof Bar includes a 5-metre connection cable. If this is not sufficient, we recommend adding an 8 m 2-core cable kit incl. cable lug and heat-shrink tubing (item no. KB-800-2L-15-K1). Some warning light bars, such as Slimline, instead have a DT connector. In this case, you need to add an 8 M 2-CORE CABLE WITH 2-PIN DEUTSCH CONNECTOR (item no. KB-800-2L-1.5-DT). If you are installing two warning light bars on a large vehicle, two cable kits may be required to power both bars simultaneously without overloading the wiring.
DIRECTIONAL WARNING LIGHT
In this example, we use V-Line Slim, but the information can also be applied to several other products, such as V-Line Bold Square and the Kula directional warning light.
You need to make the following choices:
Mounting bracket: If you are not installing the warning light directly onto a flat surface, such as the bumper, you will need to select a mounting bracket. Several different types of mounting brackets are available depending on the warning light. Here are three examples: a clamp bracket for installation in the grille, an angle bracket for installation beneath the bumper or roof rack, and a bracket for installation on the inside of the vehicle window.
Cable kit: The correct length and type of wiring is required to install the warning lights properly. For example, if you are installing two warning lights at the front, one 8 m 2-core cable kit incl. cable lug and heat-shrink tubing (item no. KB-800-2L-15-K1) is sufficient. However, if you are installing two at the front and two at the rear, you will need two 8 m 2-core cable kits (item no. KB-800-2L-15-K1), or alternatively one 8 m 2-core cable kit and one 15 m 2-core cable kit incl. cable lug and heat-shrink tubing (item no. KB-1500-2L-15-K1). The amount of wiring required depends on the vehicle model. For example, a Mercedes Sprinter L4 requires significantly more than a Volkswagen Caddy L1.
Control: Here too, you need to choose how the warning lights will be operated (see "Indicator light and switch").
BEACON
In this example, we use the Slimline beacon, but the information can also be applied to other beacons.
These warning lights have a DT connector (Deutsch connector), so you first select the cable that supplies the power, for example an 8 M 2-CORE CABLE WITH 2-PIN DEUTSCH CONNECTOR (item no. KB-800-2L-1.5-DT). If you are instead installing two beacons with a maximum distance of 4 metres between them, you also need a 4 METRE Y-SPLITTER WITH 2-PIN DT CONNECTORS (item no. KBFL-2L-15-DT-400). Here too, you need to choose how the warning lights will be operated (see "Indicator light and switch").
EXTRA VISIBILITY WITH ROOF SIGN AND X2 MARKER BOARD
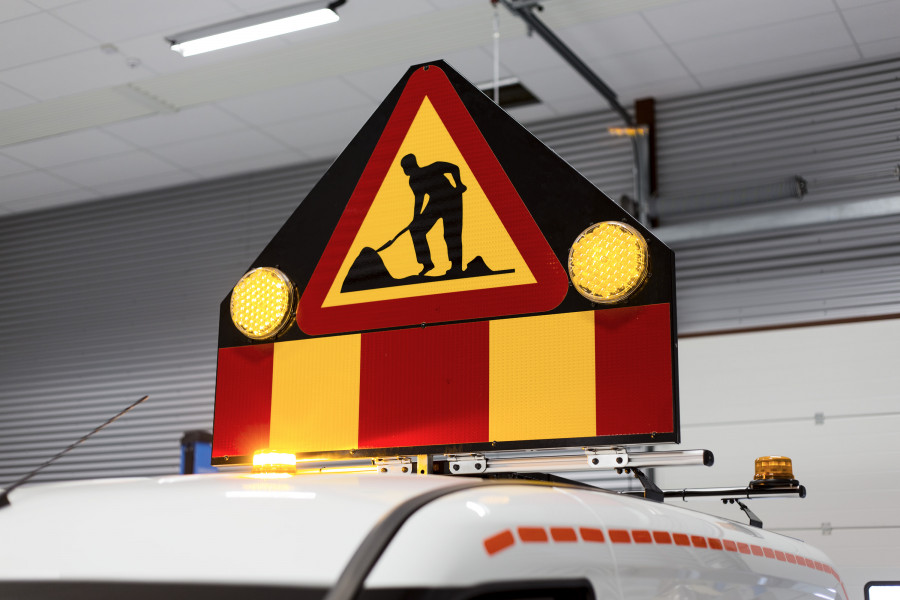
If you need additional visibility on the road, you can use our roof signs and X2 marker boards (road closure boards). In November 2024, the 1,300 mm and 1,500 mm roof signs will be equipped with a 400 mm X2 board. To comply with the requirements, it is important to follow the criteria specified by your client.
POSITIONING REQUIREMENTS
- 1. The lower marker board must not be positioned higher than 1,200 mm from the ground to its lower edge. (The simplified regulations can be interpreted as allowing the X2 board to be mounted on the roof instead of in the standard position if the design of the vehicle prevents standard installation – see more below.)
- 2. The marker board must be centred and may be no more than 200 mm narrower than the width of the vehicle, i.e. a maximum inset of 100 mm on each side.
- 3. The lower marker board may have an interruption of no more than 500 mm, for example to accommodate a towbar.
- 4. The marker board must be 400 mm high. If several boards are used, a height of 300 mm per board is sufficient.
- 5. Marker boards must be positioned at least 1,000 mm apart.
- 6. Any road signs must be positioned between or above the marker boards.
The image below shows an installation approved in accordance with the Swedish Transport Administration's regulations.
.jpg)
SIMPLIFIED INSTALLATION OF ROOF SIGNS AND X2 BOARDS
Excerpt from TDOK 2012:86, version 5, page 48:
"On work vehicles, motorised equipment or machinery, the X2 obstacle marker board may instead be mounted on the roof if required due to the physical design of the vehicle, equipment or machinery. The device must cover at least the width of the roof. The device must be at least 0.4 m high. For a roof-mounted X2 board, the requirement for a maximum height of 1.2 m to the lower edge does not apply."
Our interpretation:
Most vehicles have different types of installations that we interpret as obstacles, such as parking sensors, number plates, handles, rear lights and reversing cameras. Based on our interpretation of the regulations, in most cases it is sufficient to install a 400 mm X2 board on the roof without additional signage below a height of 1,200 mm. However, it is important to emphasise that this is only our interpretation of the regulations, and different assessments may be made during an inspection. It is therefore the customer's responsibility to verify that the installation complies with both applicable legislation and the requirements specified by the customer's client.
FIELD LAYOUT OF X2 MARKER BOARDS
This can be somewhat complicated, but there are three important aspects:
1. There must be both red and yellow fields – at least 3 red and 2 yellow.
2. The outermost fields must be red and at least 100 mm wide.
3. A single board must be 400 mm high. If you instead choose to install two or more boards above one another, each board only needs to be 300 mm high.
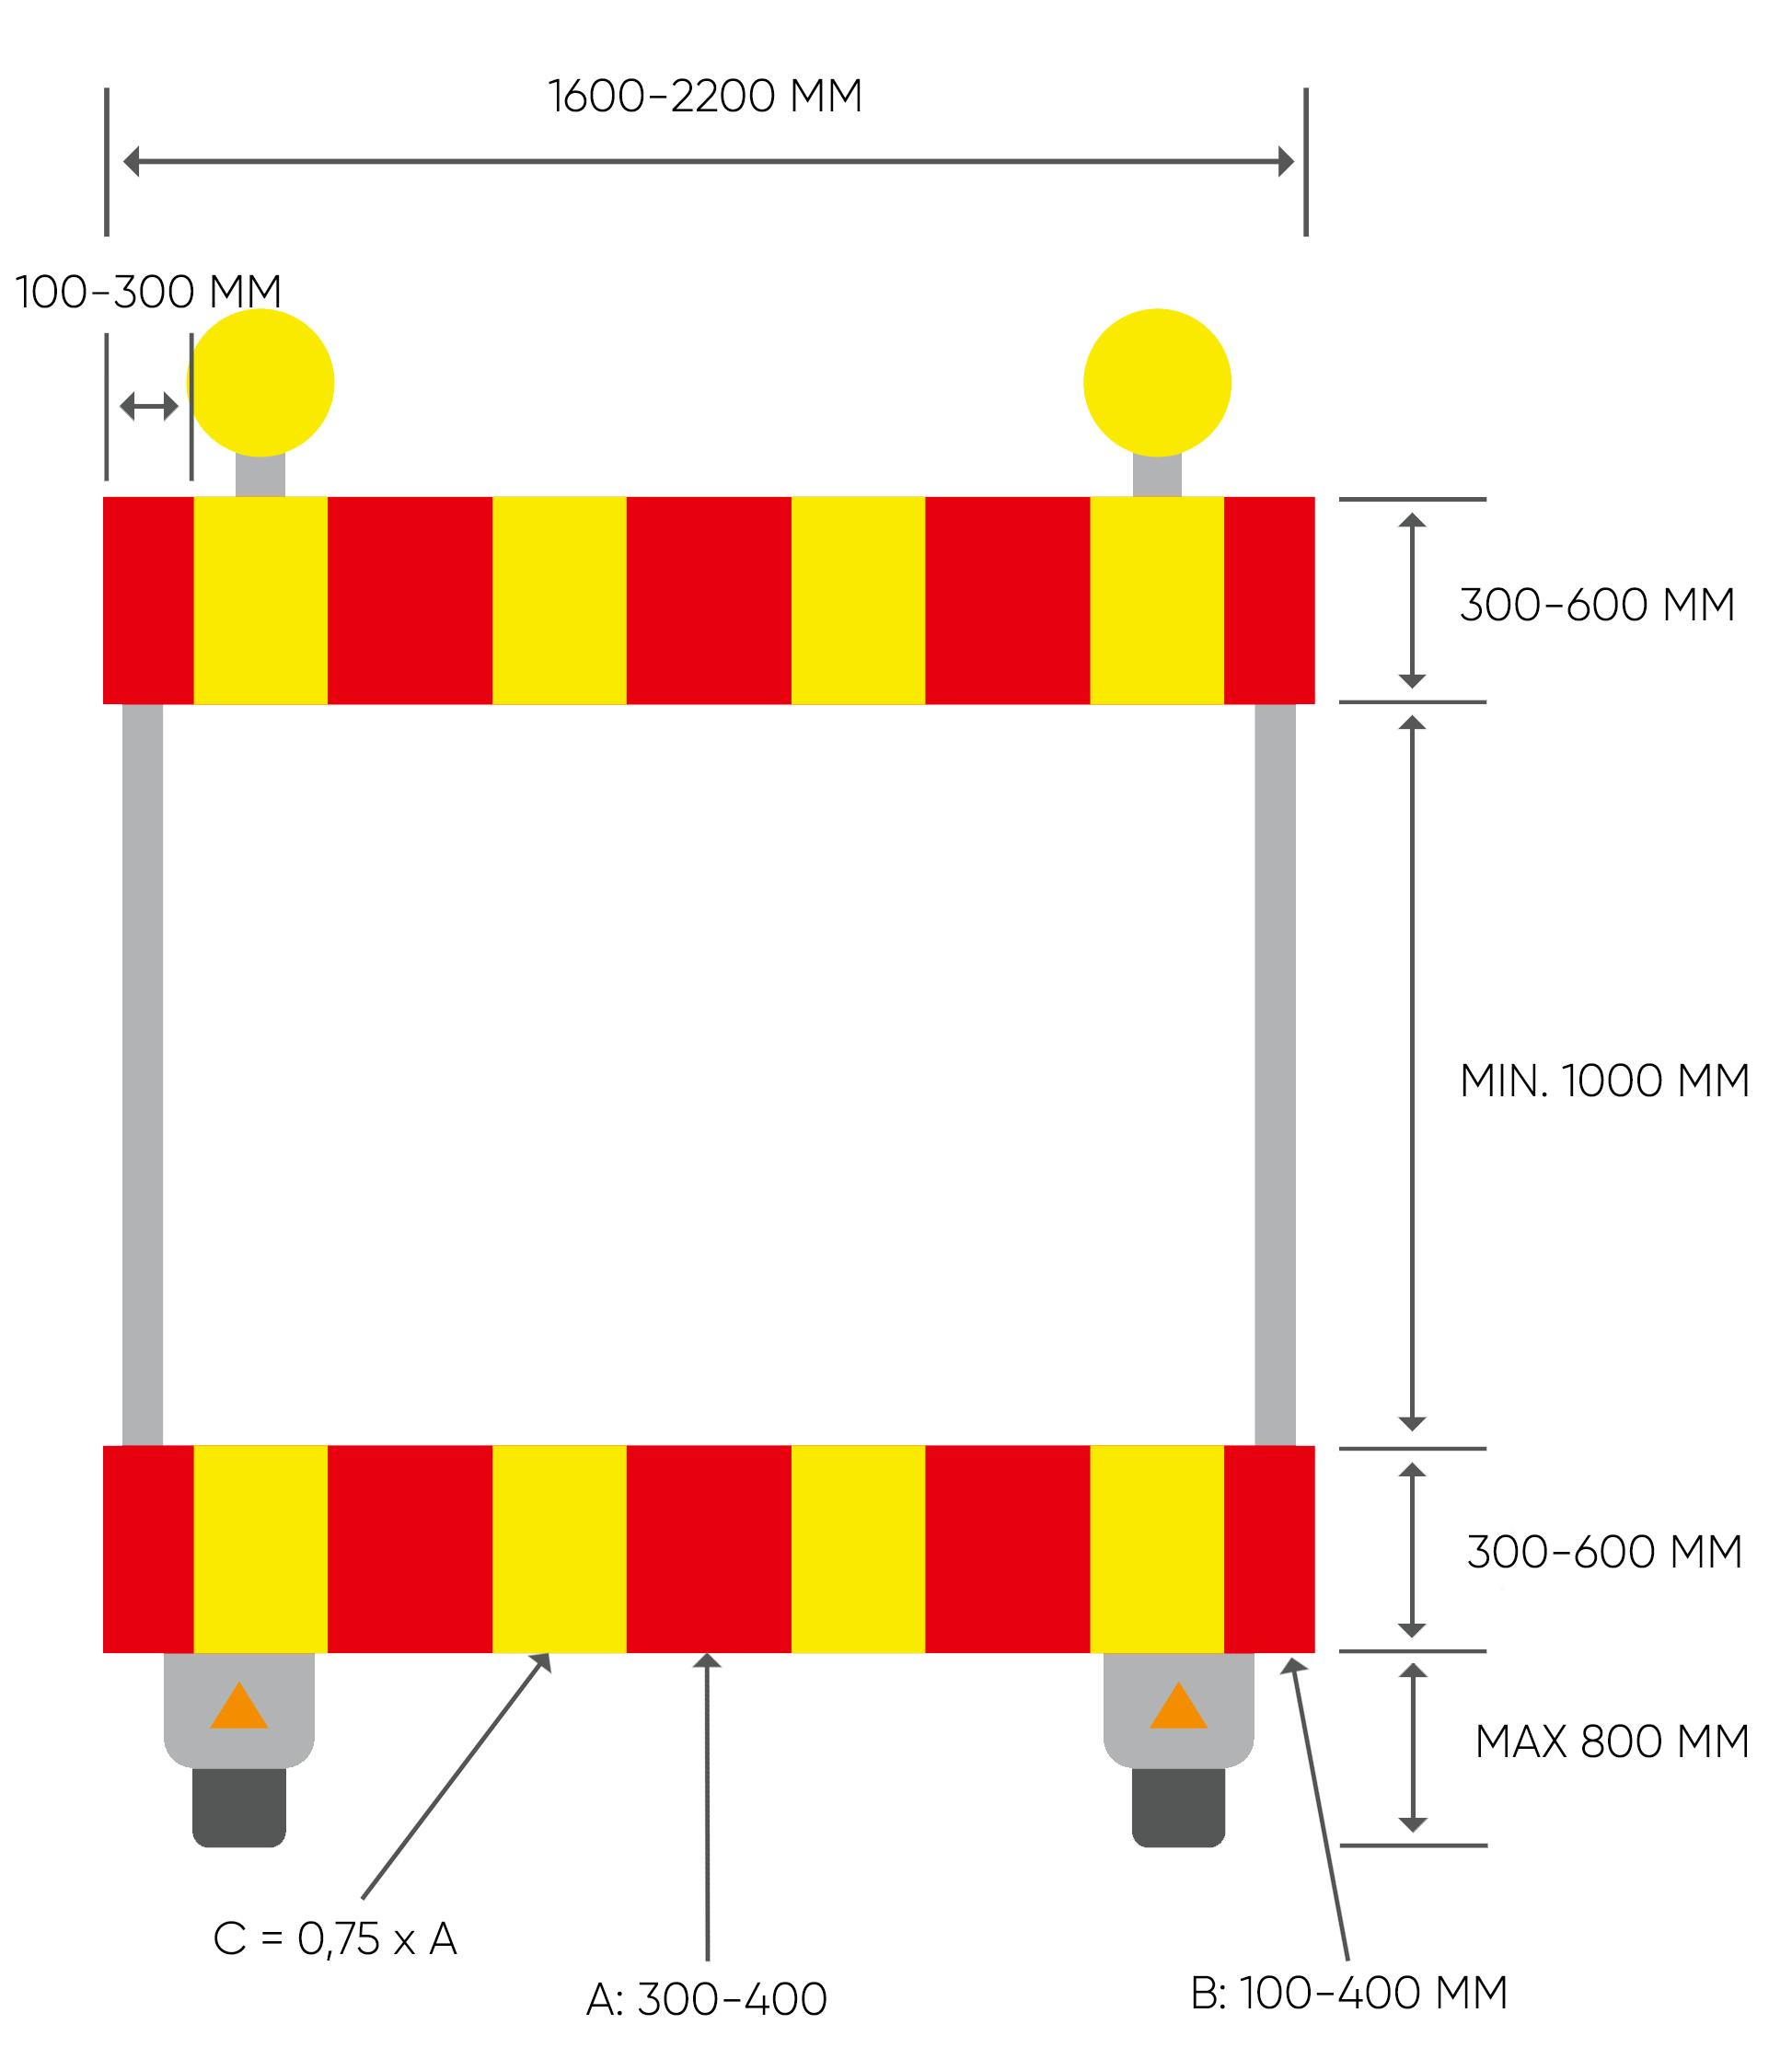
Source: Utmärkning av fordon i väghållningsarbete (Marking of Vehicles Used in Road Maintenance Work).
Useful links for more information:
Swedish Transport Administration's technical requirements for Work on Roads &
Swedish Transport Administration's guide to working with road maintenance vehicles.
PLEASE NOTE...
- X2 marker boards can be mounted on both doors and bumpers, but keep in mind that bumper-mounted boards may obstruct parking sensors- You may need to supplement the installation with warning lights behind the board to meet the visibility requirements
- The L8H lights on the roof sign do not count as warning lights
- When the A20 sign or roof sign is raised, the warning lights must also be switched on
Remember that the Swedish Transport Administration or the client may impose stricter requirements for certain roads or vehicles, such as TMA vehicles. There are also cases where the requirements are less stringent, including in some municipalities.
EXAMPLES OF SIGNS AVAILABLE IN OUR RANGE
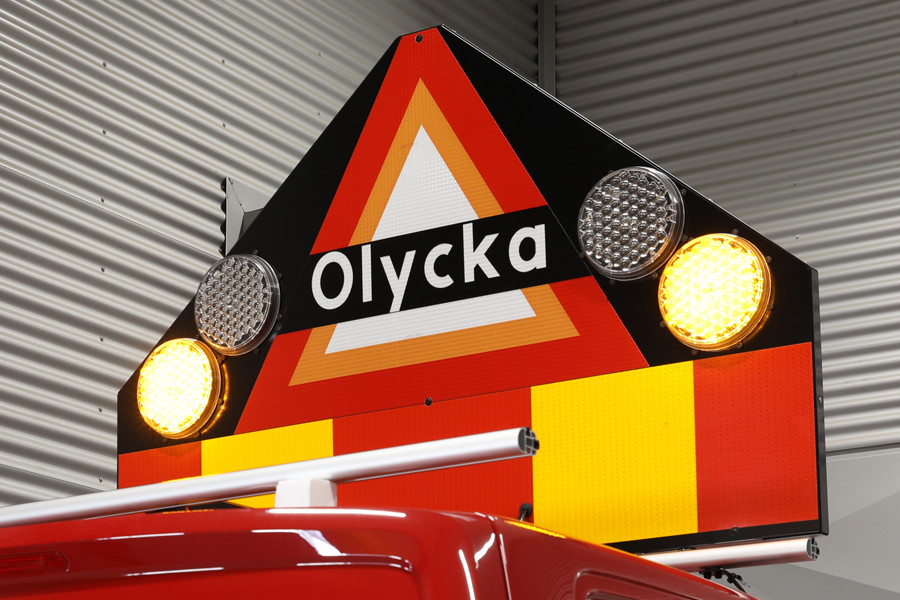
A20
Accident
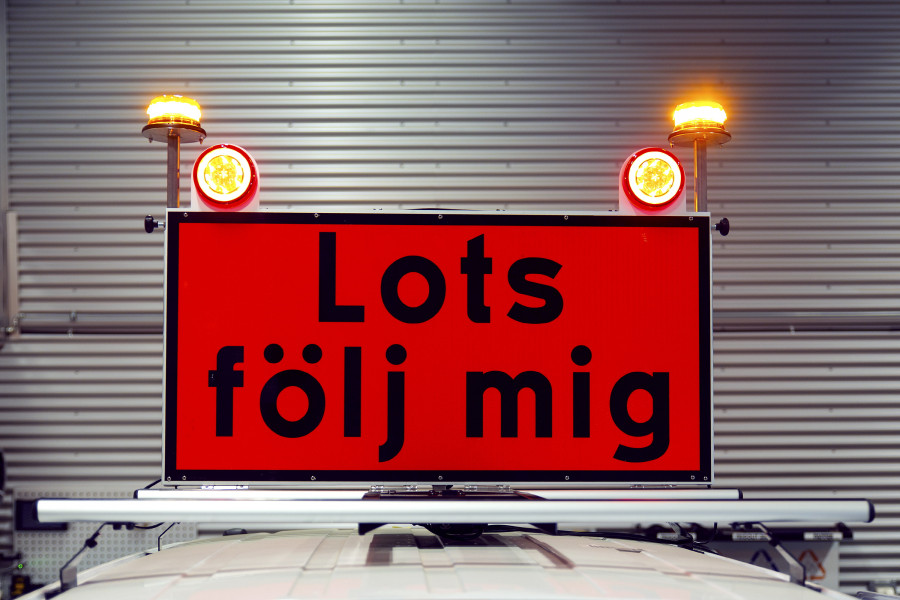
Wide load / Road transport escort / Warning

Pilot
FLATBED SIGNS
We also offer signs designed for installation on flatbed vehicles. Their main advantage is their low-profile design.
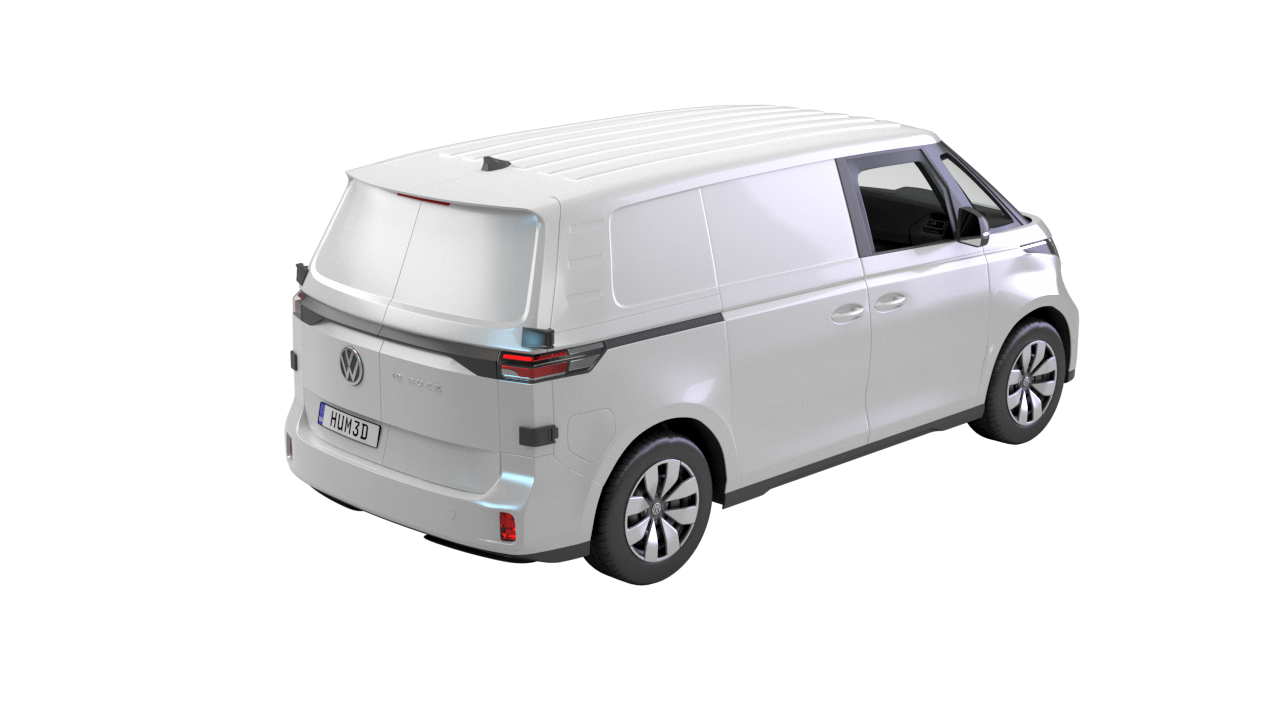
 Right door
 Left door
 Double door
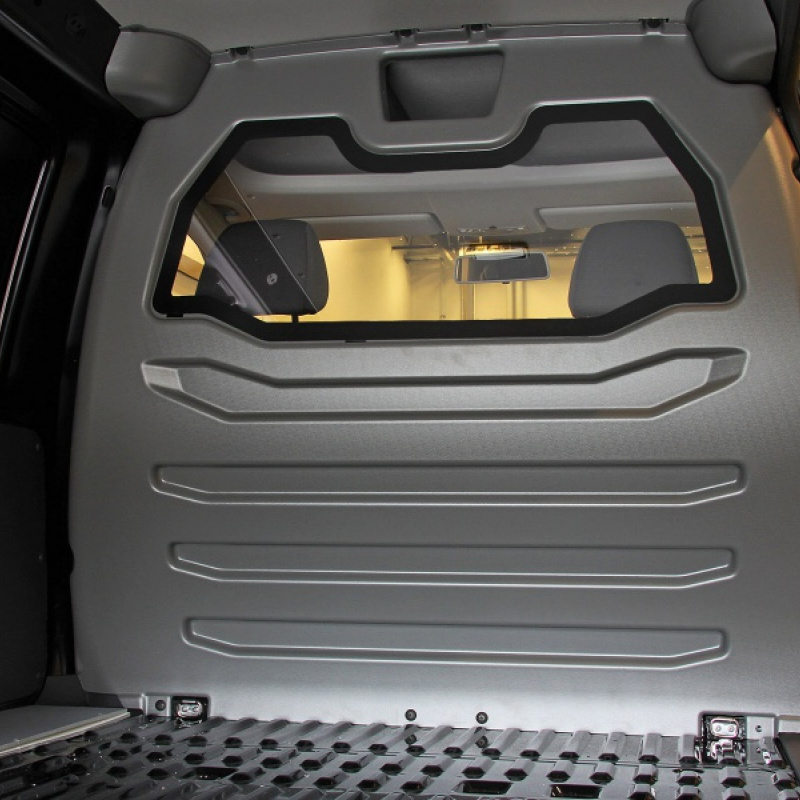 Wall 1


